Each session we had with Andy had a very similar structure as it began with simply typing words into Abode Illustrator CS6 and editing them in various ways that were unique in comparison to other pieces of design software, for example: Abode Photoshop CS6 or Abode InDesign CS6.
Text Strokes Fill
 |
| Text Strokes Fill |
In our first session with Andy, with our names, we experimented with: the colours and patterns available that could be used to fill in the body of the text, as well as that which can be used to fill the line that outlines the text. At the same time, we were able to experiment with the width of the outer line (bearing in mind that a very thin line wouldn't be visible, and a rather large outer line would make the writing almost eligible), and finally, the size of the individual letters in relation to others surrounding it and the positioning of each against one another; this could only be achieved however by adding outlines to the original text, making them editable before anything else. (Similarly, if we created outlines to text, not only could we do this but we could also, by layering an assortment of straight lines over the original text, we could seperate the actual lettering itself.)
3D Text
 |
| 3D Text |
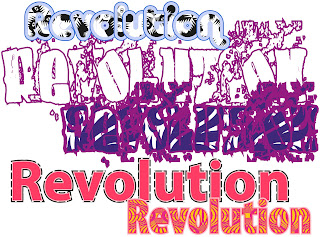
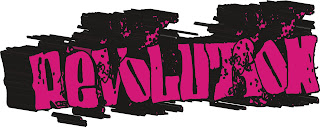
In our second session with Andy, after having typed "Superman", chosen our font (preferably a bold block style text) as well as the colours / patterns we wished to fill both the main body and the lines with; by selecting "Effects" and "3D" we were able to alter the angle of the lettering and the extent to which the lettering drags backwards, in turn producing 3D text.
At the end of the day, I could have used the word "Superman" to produce a sample of 3D text as was suggested in this particular session; nevertheless, to me it made more sense to experiment with the word Revolution as this the title of the music magazine that I was designing with Julie in her sessions around the same time. My thought process was that if I liked the result of one of these experiments significantly more than those alongside it, whether that be by using multiple strokes or 3D text. In turn, I could have incorporated this into the front cover design of my magazine. Unfortunately, I didn't choose to use any that I had produced with Andy. Although I liked the majority for different reasons, I thought that the use of such bright colours (for example: baby blue, violet / magenta, pink and yellow) although aesthetically pleasing to younger people, wasn't suitable for a teenagers / young adults magazine. It also wouldn't compliment the dark, ominous feel I was trying to put across through the design as well as topic of the magzine. Furthermore, I believe that the significant use of black used in the 3D Text experiment above, alternatively does put across this feeling but subsequently makes the text a little difficult. This particular factor in turn makes the final experiment unsuitable as well.
Basic and Building Graffiti
 |
| Spirals (Basic and Building Graffiti) |
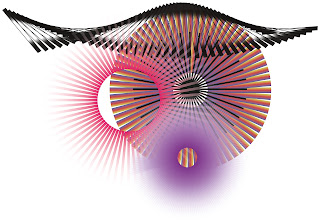
In our third and fourth sessions with Andy we learned how to make patterns such as the "spiral", through the use of a new tool entitled "Rotation".
1) Draw a single line, or as an extention task, a small pattern.
2) Select the "Rotation" button, to the left of the screen once.
3) Hold down the "Alt" key on the keyboard and select and when a small icon appears at the tip of your mouse, select a place on the screen where you would like the spiral to rotate from (ideally at the end of the line / pattern you have just drawn to begin with).
4) A small box will then appear in the middle of the screen. Here you select the angle you wish to have between each line / pattern in the spiral (in other words, this will determine how many lines / patterns there will eventually have in the completed apiral), and then, when your happy select
COPY.
5) The box will now disappear and all you have to do in order to complete the spiral is to press "Ctrl" and "d" at the same time repeatedly until the spiral is complete.
Furthermore, we also learnt how to create alternative "Pattern Brushes" by editing an existing image from the Internet and often shrinking it down (preferably featuring something similar to a chain or an object surrounded by white negative space). You can then use this to paint on Illustrator.
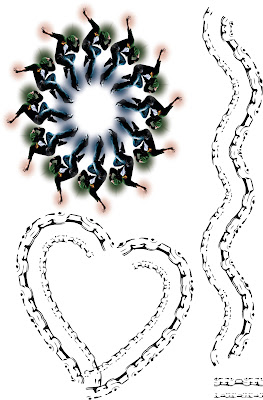 |
| Spirals 2 and Live Trace (Basic and Building Graffiti) |
Recreation Google Logo design in Abode Illustrator CS6
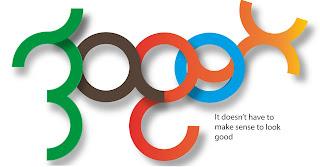
In our final session of the project with Andy we had to use all the skills we had learnt with him on Illustrator over the last few sessions to recreate an existing Google logo. This entailled experimenting with use of shape, colour, gradient and drop shadows. All these skills are useful if and when we design are own logos in the future. Here is my attempt:
Though I was limited with the software we were using as to what I could and could not produce, this would explain why there are some details, particularly shadows that I are missing from my attempt. Despite these miner set backs, I'm still happy.


